
Encapsulating crawl spaces is a crucial step in maintaining the integrity of the structure of your entire home, improving energy efficiency, and enhancing indoor air quality. This guide will walk you through the process, providing you with detailed steps and additional tips to ensure your crawlspace encapsulation is both effective and long-lasting.
Understanding Crawl Space Encapsulation
Crawl space encapsulation involves sealing it with a vapor barrier and other materials to prevent moisture intrusion, reduce humidity levels, block out light, and protect against mold and pests. This process can significantly improve your home’s overall health and efficiency in energy.
Related Articles: The Ins and Outs of Crawl Spaces in Oklahoma Part One, Part Two
Step-by-Step Guide for DIY Crawl Space Encapsulation
1. Assess the Condition of Your Crawl Spaces
Before starting the encapsulation process, thoroughly inspect your sealed crawl space for any existing issues such as mold, pests, or structural damage. Address these and other problems first before proceeding.
Tip: Wear protective gear such as gloves, goggles, and a mask during the inspection to safeguard against dust, mold spores, and other potential hazards.
2. Clean the Crawl Spaces
Remove any debris, old wall insulation, or other materials that might be in the pipe or crawl space. This creates a clean slate for encapsulation.
Additional Info: Cleaning the crawl space thoroughly can also help identify hidden problems and other debris that need to be fixed before encapsulation.
3. Seal All Vents and Gaps
Using a high-quality sealant or spray foam in the rim joists, close off any vents, gaps, or openings in the crawl space walls and the concrete foundation. This step prevents outside air and moisture from entering most crawl spaces.
Helpful Tip: Pay special attention to areas around pipes, wiring, lighting and ductwork, as these are common entry points for air and moisture in foundation walls to the sump pump.
4. Install a Vapor Barrier on the Floor Insulation
Lay down a heavy-duty polyethylene vapor barrier on the crawl space floor joists. Overlap the seams by at least 12 inches and secure them with waterproof tape. Extend the barrier up the walls by about 6 inches and secure it.
Entertaining Note: Think of the vapor barrier material as a raincoat for your crawl space floor, keeping it dry and protected from the elements.
5. Insulate the Walls
Attach rigid foam board insulation to the crawl space walls. This helps regulate temperature and further reduces moisture infiltration.
Additional Info: Choose insulation with a high R-value for better thermal performance and efficiency in energy.
6. Install a Dehumidifier
Place a dehumidifier in the crawl space to control humidity levels and prevent mold growth. Ensure it’s correctly sized for the area and has an automatic drainage system.
Helpful Tip: Regularly check and maintain the dehumidifier in the HVAC system to ensure it operates efficiently.
7. Seal the Access Door
Ensure the crawl space access door is tightly sealed to prevent air and moisture ingress. Consider replacing an old or damaged door with a new, insulated one.
Entertaining Note: Imagine the crawl space door as the gatekeeper box of your newly encapsulated space, keeping it secure and dry.
Additional Tips for Effective Crawl Space Encapsulation
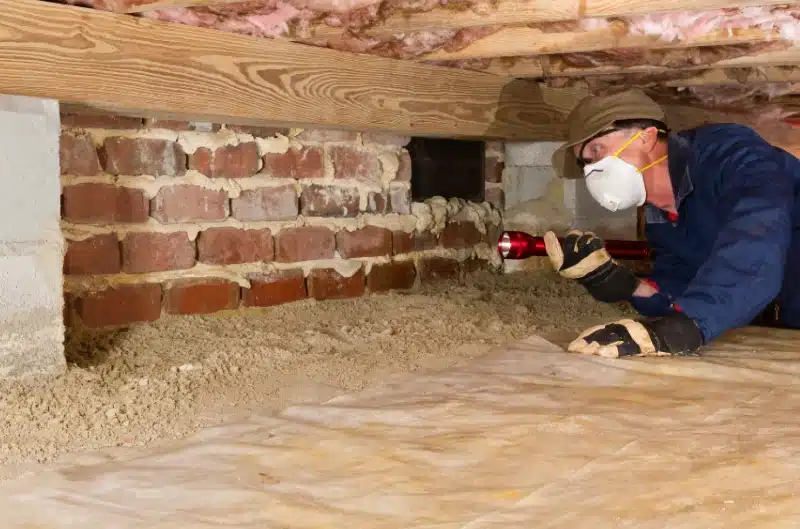
- Regular Inspections: Periodically inspect your encapsulated crawl space to ensure everything remains in good condition. Look for signs of moisture, mold, or damage to the vapor barrier.
- Pest Control: Encapsulation can help deter pests, but it’s wise to maintain a pest control plan to keep your crawl space free from unwanted visitors.
- Professional Help: If you’re unsure about any step of the process, consider consulting a professional. They can provide expert advice and ensure your encapsulation is done correctly.
There is Mold in the Crawl Space, Now What?
Discovering mold in your house or crawl space can be alarming, but it’s a common issue that can be effectively managed. Mold not only affects the air quality in your home but can also lead to structural damage if left untreated.
Here’s a step-by-step guide to addressing mold in your crawl space:
1. Identify the Source of Moisture
Mold thrives in damp environments, so the first step is to identify and eliminate the source of moisture. Common sources include leaks, standing water, high humidity, and poor ventilation.
Helpful Tip: Use a ground moisture meter to correctly determine hidden damp areas that may not be immediately visible.
2. Ensure Proper Ventilation
Improving ventilation can help reduce moisture’s levels. Ensure that your basement or crawl space is well-ventilated to facilitate air circulation.
Additional Info: Consider installing a ventilation fan to increase airflow and reduce humidity.
3. Remove Moldy Materials
Carefully remove any moldy materials, such as old insulation or wood, from the roof or crawl space. Seal them in heavy-duty plastic bags to prevent mold spore from spreading during disposal.
Entertaining Note: Think of this step as giving your crawl space a fresh start, free from any moldy remnants of the past.
4. Clean the Affected Areas
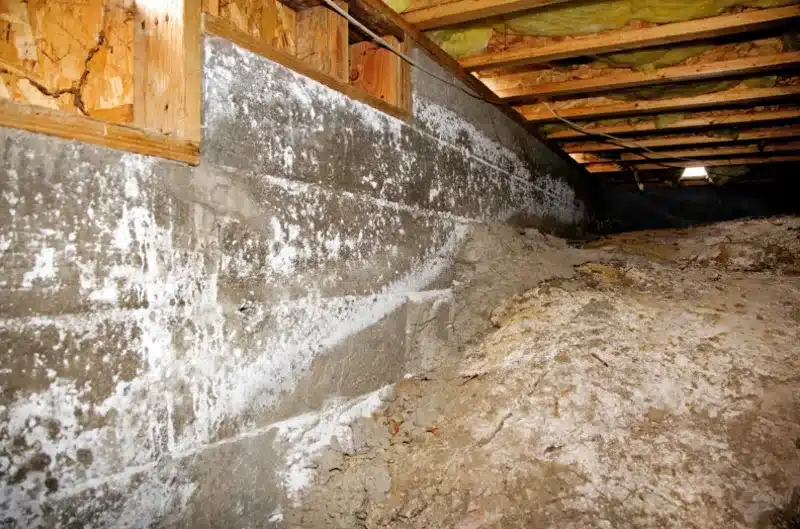
Use a mold-specific cleaner or a mixture of water and detergent to scrub the affected areas. For larger infestations, you may need a commercial-grade mold remover or consider hiring a professional.
Helpful Tip: Always wear protective gear correctly, including gloves, goggles, and a mask, to protect yourself from mold spores.
5. Dry the Crawl Space Thoroughly
After cleaning, ensure the crawl space is thoroughly dried. Use fans, dehumidifiers, or even a wet/dry vacuum to remove any remaining moisture.
Additional Info: Drying the area completely is crucial to prevent mold from returning.
6. Apply Mold-Resistant Coatings
Once the area is clean and dry, apply a mold-resistant coating or sealant to the topmost surface of crawlspaces and space surfaces. This creates a protective barrier against future mold growth.
Helpful Tip: Correctly choose a product, from a home improvement store, that is specifically designed for spaces and provides long-lasting protection.
7. Monitor and Maintain
Regularly monitor the crawl space for signs of moisture and mold especially if you have cinder block walls. Maintaining a low humidity and moisture level is key to preventing mold recurrence.
Entertaining Note: Think of this as a regular health check-up for your crawl space, ensuring it remains in top condition.
Additional Preventive Measures
- Install a Vapor Barrier: Installing a vapor barrier as part of your encapsulation processes can significantly reduce moisture levels, and soil gases, and prevent mold growth.
- Use a Dehumidifier: A dehumidifier can help maintain optimal humidity level in your crawl space, making it less conducive to mold growths.
- Seal Cracks and Gaps: Ensure all cracks and gaps are sealed to prevent moisture intrusion from the outside.
Encapsulating a crawl space might seem like a daunting task, but with the right knowledge and approach, it can be a straightforward and rewarding project. However, if you prefer to leave it to the experts, consider consulting OK Foundation Solutions.
By taking the time to do it right, you’ll enjoy the benefits of a more energy-efficient and healthier home for years to come. For professional assistance, call 405-331-7171.


